Wondering how to protect event ID badges in important venues? IMAGE provides the ideal solution: Hologram Laminate Pouches – secure, tamper-proof, professional for all high-standard events.
If you’ve ever applied for parking access, attended a sports event, or joined a large conference, you’ve probably had the experience of wearing a badge.
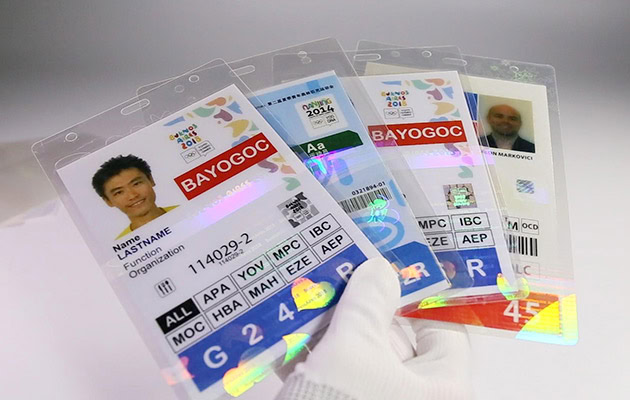
Structure of an event ID badge
And maybe, like me, you’ve caught yourself taking a second look at it—wondering why it looks so attractive, dynamic, and polished, and feels so smooth to the touch. Today, let’s take a closer look at what’s really behind these seemingly simple event ID badges.
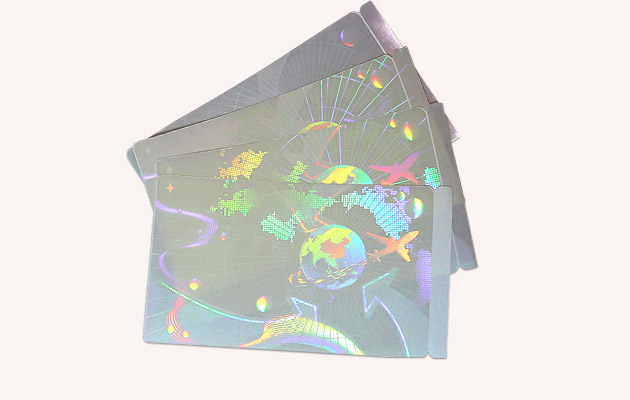
In fact, the structure of an event ID badge is quite straightforward. It usually consists of three parts: a lanyard, the inner core, and the outer protective layer that gives it that glossy, eye-catching finish. In our industry, we typically call this outer layer a hologram laminate pouch.
Our company has been producing these laminate pouches for many years. From major sports events to large conferences, many projects have used our products.
Our experience in major events
Our company (IMAGE TECH) has done different projects since 2008. The first project we did is Beijing Olympic Games. And in the past 10 or 15 years, we have had different projects, for example 2010 Guangzhou Asian Games, 2014 the Inchon Asian Games.
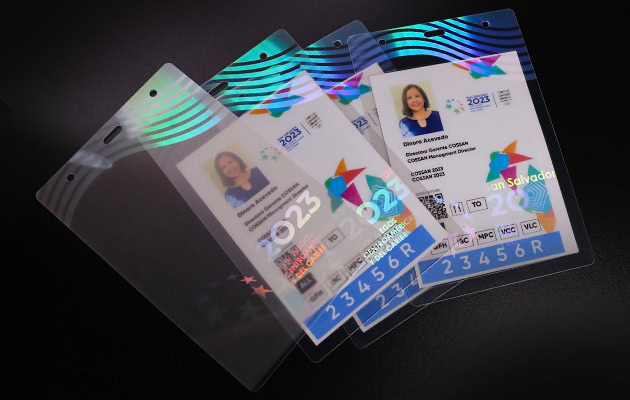
And in recent years, in 2018 the PyeongChang Winter Olympic Games, also the G20 Summits, Hangzhou Asian Games, also in Argentina, the capital city Buenos Aires, the Youth Olympic Games, including the 2023 Central American and Caribbean Games in El Salvador, and the 2023 Pan American Games in Santiago.
很多项目的图片
Our company has rich experience in ID credentials for some major sports events and large meeting venues.
So, today I’ll keep things focused and walk you through the holographic laminate pouch itself—the part that not only enhances the appearance of the event ID badge but also protects the inner core inside. (The inner core is printed with personalized data)
Maybe someone wonders why it is called a laminate pouch. The name comes from its structure; this product has two layers: the front one and the backside. It’s like a pouch, yeah, so it’s called a lamination pouch.
Step-by-Step Lamination Process
Now that we’ve learned what it is and how it’s named, let’s get to the part many people are curious about: how does the lamination process actually work?
How does it seal the inner core with printed information so securely while creating that smooth, glossy, almost colorful finish? Let’s walk through the process step by step.
Because we’ll do the lamination process, and the lamination needs to use a lamination machine.
Here is a pouch laminating process flow chart to show you how to use it to do the lamination process. Some paper inner core which are already printed with personal data and some information. Then fold from the middle, insert it into this pouch.
You may notice that some pouches are made with punched holes, because we will put them on the lanyard, and put them like this picture.


Now we know it’s a basic lamination process. Someone may ask, can we do the lamination by ourselves? Are there any questions that we need to pay attention to during the lamination?
Yeah, absolutely, most of our customers purchase our hologram laminate pouches, and then do the lamination by themselves. Here are some common questions you may want to know when you do the lamination.
Seven Common Questions During Lamination
1. About lamination temperature and speed when laminating the pouch.
We usually set the temperature to 140°C and the speed to 5 (the speed range is from 0 to 9). The exact settings depend on the thickness of the inner core and the material and thickness of the laminate pouch.
You’d better adjust the temperature based on the product you’re laminating—its thickness and size—and fine-tune the settings to find the best result.
2. How long does lamination take?
It takes about 5 to 10 seconds for one lamination cycle.
3. How to place the inner core when feeding the pouch into the laminator.
Before lamination, make sure the inner core is inserted all the way to the bottom of the pouch. Keep the left and right margins roughly even.
4. Why does the pouch become transparent after lamination?
Before lamination, the laminate pouch looks semi-transparent (translucent). After lamination, it becomes fully transparent.
This is because the inside of the pouch is coated with a hot-melt adhesive layer. When heat is applied during lamination, the adhesive melts and turns clear.
5. Can you laminate only one laminate pouch at a time?
The laminator is about 40 cm wide, so if you have multiple hologram laminate pouches, you can laminate two or more at once. This works well when you have a large batch of ID badges. If you’re not in a rush, you can also run them one by one.
6. Is inspection needed after lamination?
Yes, after lamination, you should check whether the edges are properly sealed. Also, place the card on a flat surface to see if it stays flat or starts to curl.
If it curls too much, the temperature may be too high or the speed too slow, meaning too much heat was applied.
For some products, if one pass is not enough, you can laminate them a second time to improve bonding strength.
7. Why is the lamination result sometimes not good?
This can also be related to the inner core. For example, if the paper is too thick, it may not laminate properly. In this case, you’ll need to adjust the settings—usually by increasing the temperature (for example, up to 145°C) or reducing the speed.
Higher temperature means more heat, and a slower speed also increases heat exposure during the process.
The above are some common questions about the laminating of plastic laminate pouches. I hope you can have a clearer understanding of this product and the process behind it, as well as the small details that are easily ignored during the laminating process.
At the same time, we can also see our rich experience in practical projects on this series of products. If you have any questions about hologram laminate pouches, please contact our IMAGE TECH at any time.